By Karl Roberts, Senior Consultant, Avocado
In this Tech Tip post, I will take you through how to push a Docker Image to a Personal Repository. You may ask, why would you push your own image? After using Docker for a while, I personally found that I wanted more control over the images I wanted to base my container on.
If you have a Dockerfile, you can always use it to build an image locally using

Alternatively, if you want the image to have a tag name to make it easier to recognise:

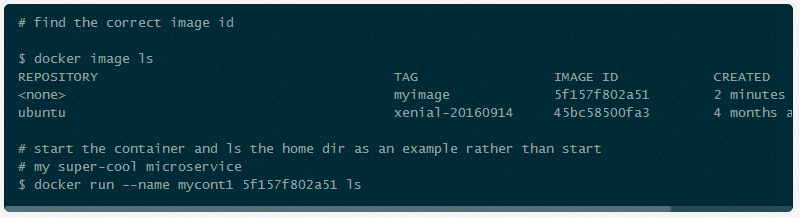
After the base image has downloaded and all the commands in the Docker file have run, you’ll have an image locally.
This is great as it gives you the ability to spin up a container based on the image and run a command there, such as to kick off your micro-service.

However, a potential issue with the above process is that if I want a co-worker to kick off his micro service, or we want to run it in multiple “environments” then he will have to run the docker build first and then run it.
This takes some time.
Imagine how long it would take if your container was based on ubuntu and in the Dockerfile you ran
apt-get update
and
apt-get upgrade -y
not to mention the time it takes to install necessary software such as Java, Mono, Python or Ruby. The whole process could easily take 10 minutes or more to run the build.
But that isn’t the biggest problem. What if a Python dependency or Ruby Gem had changes since you ran your build? Not only could the install fail because, in this case, other different dependencies would need to be pre-installed but also your co-worker’s build will now be different to yours.
All your version controlled guaranties are now moot.
Clearly we want him to have the same exact image as us.
To find out how to resolve this issue, click here to go to my technical blog and I will take you through the steps.
I hope the page allows you to to take advantage of Docker in both the development and production environment.
